Azure DevOps is a SaaS Agile/Build and Release tool for Software Developers and DevOps Engineers enabling automation of the build and deployment of code. Out of the box Azure DevOps provides free hosted agents that have a predefined set of tools installed and configured for building and deploying your apps.
Initially, the Hosted Agents are great to get stated but as your team grows and your dependance on Azure DevOps increases to the point where you are building and releasing software all day in a CI/CD pipeline you will start to become limited by the availability and concurrency of the hosted agents. With the free tier you can concurrently run only a single build or release across the entire organisation.
If you wish, you can just increase the number of concurrent builds whilst still using the Microsoft provided hosted agents – however these costs soon start to ramp up. Each additional increment of concurrency costs £29.82 per month or you can run your own self hosted agents which if done correctly can be more cost effective and allows you to maintain more control over packages and their respective versions.
Running your Self Hosted Agent
There are a number of options available to you to be able to run self hosted agents. You can quite simply download the agent package, and run it on your local machine. There are packages available for Windows, Linux and MacOS and it is very simple to get started. This tutorial will cover running the agent on your local machine and as a Docker Container – but in principle both methods allow you to run your own build agents.
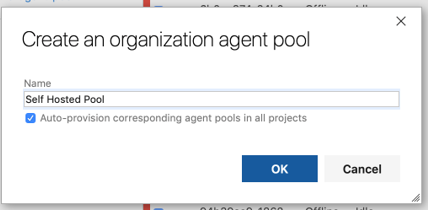
Before you can run a self hosted agent you need to create an Agent Pool. Head to your Azure DevOps organisation URL and click ‘Organisation Settings’ -> ‘Agent Pools’ -> ‘New Agent Pool’.
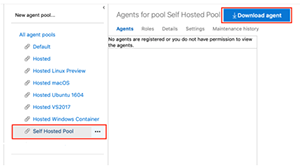
Once you have created a new Agent Pool you can Download the Agent Software by clicking ‘Download agent’ when viewing the Pool. Choose your Operating System version and click ‘Download’
Open up your terminal window and change directory to the folder containing the downloaded file. Inflate the file to view the contents.
```$ tar -xvf vsts-agent-osx-x64-2.142.1.tar```
First, you need to generate the agent configuration file using the interacting configuration generator script.

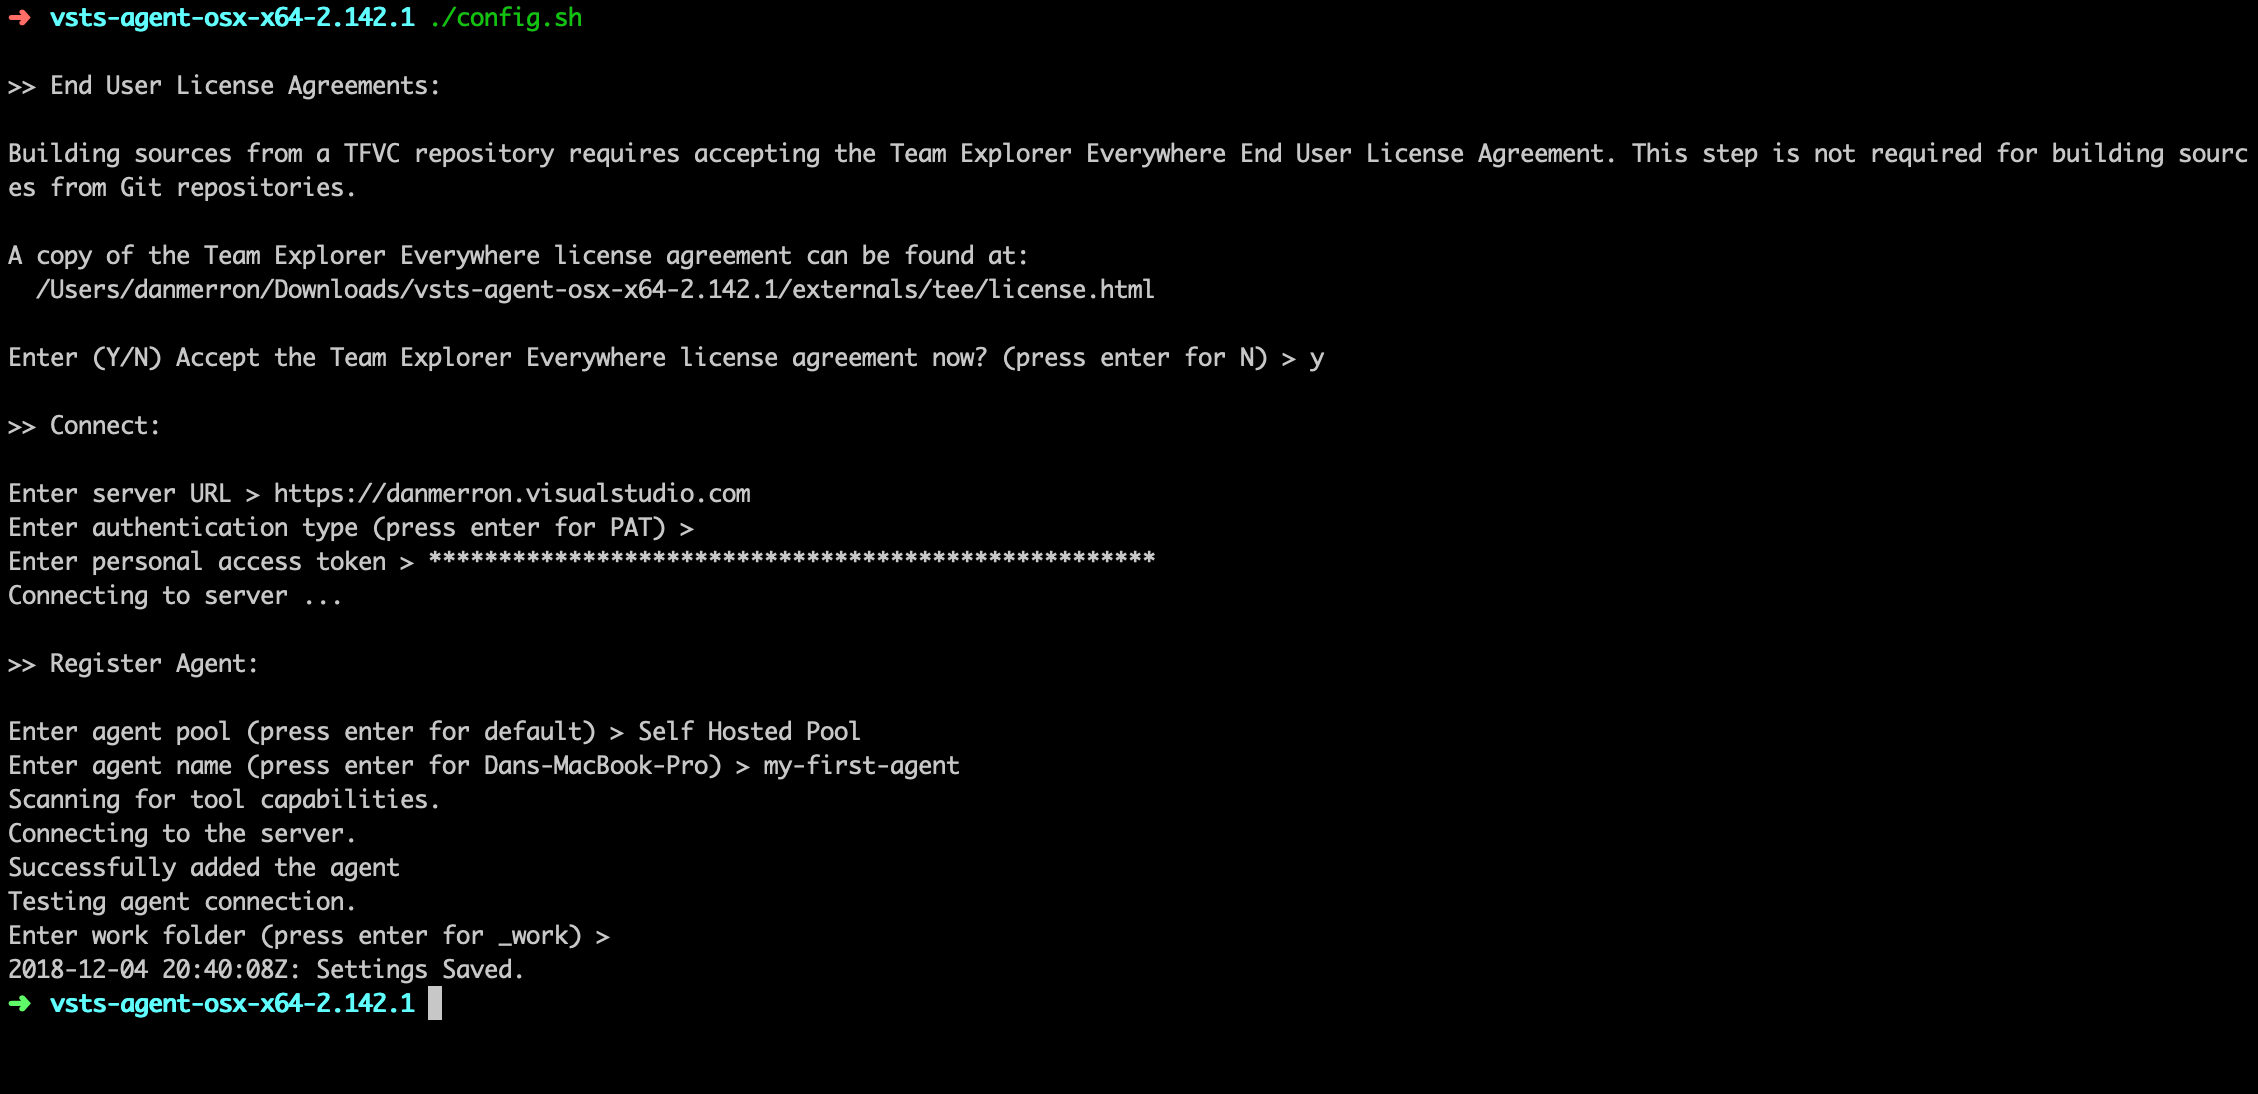
./config.sh
Now the configuration has been generated you can start the agent. You will see the agent has started listening for jobs and the agent shows as available in your Azure DevOps Pool in the Web UI.
$ ./run.sh
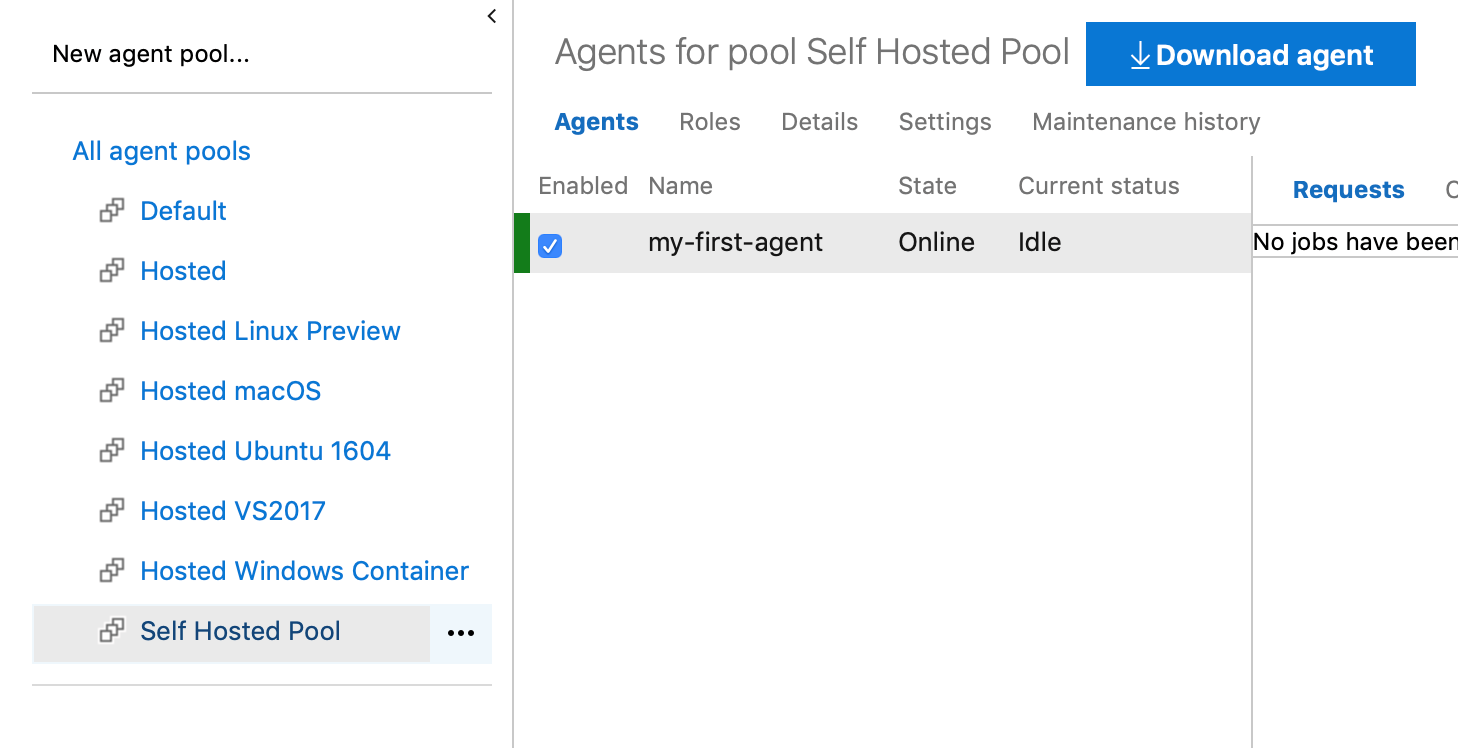
Now you have your very own Self Hosted Azure DevOps build agent running, however it’s limited in its functionality since it is running on your local machine. From here, you can either run this utility on a VM in the cloud or run docker containers containing the VSTS agent image.

Running the Azure DevOps Self Hosted agent Docker Container
The benefits to running the VSTS agent inside docker containers is the ability to run as many instances of the agent as your VM can handle, thus giving you many available agents for your builds and releases to pick from. Additionally, you can customise the image with your own software packages and versions and set capabilities for each to keep your agent images smaller.
To run the Azure DevOps Docker Agent you simply need to pull the image and run with the usual docker commands. You can find the image on Docker Hub https://hub.docker.com/r/microsoft/vsts-agent//
$ docker pull microsoft/vsts-agent
$ docker run --env VSTS_ACCOUNT=danmerron --env VSTS_TOKEN=ygw5bgfavaptvetz5hyjquasuvcwifivbj6vl2izt2g43drrhwwq --env VSTS_POOl='Self Hosted Pool' microsoft/vsts-agent
You now have a dockerized Azure DevOps agent running in your self hosted pool. You can run the same `docker run` command to spin as many as you like giving you much more flexibility to eliminate the limitations and costs of the hosted agent concurrency. Since this is running inside Docker this can also be run inside your Container Orchestration tool of choice.

